Debugging Environment Variables in Next.js Supabase
The Next.js Supabase Turbo Dev Tools allows you to debug environment variables using contextual information and error messages.
The Next.js Supabase Turbo Dev Tools allows you to debug environment variables using contextual information and error messages.
How to debug environment variables using the Next.js Supabase Turbo Dev Tools
The Next.js Supabase Turbo Dev Tools allows you to debug environment variables using contextual information and error messages.
 Click to expand
Getting Started with the Dev Tool
If you run the pnpm run dev command, you will see the Dev Tools at http://localhost:3010/variables.
You can choose two different modes:
- Development Mode: This mode is used when you run the
pnpm run devcommand - Production Mode: This mode is used when you run the
pnpm run buildcommand
Development Mode
In the Development Mode, the Dev Tools will show you the environment variables used during development. This is useful when you are developing your application and want to see the environment variables that are used in your application.
This mode will use the variables from the following files:
.env.env.development.env.local
Production Mode
In the Production Mode, the Dev Tools will show you the environment variables used during production. This is useful when you are deploying your application and want to see the environment variables that are used in your application.
This mode will use the variables from the following files:
.env.env.production.env.local.env.production.local
Generating Environment Variables for Production
The right-hand side of the Dev Tool shows the effective environment variables that will be used in production. That is, the value that will ultimately be used in your application based on where they're defined.
The "Copy" button will copy the environment variables to your clipboard in a format that is ready to be pasted into your hosting provider's environment variables.
The Copy button will merge the variables from each environment file using the effective order of resolution.
The recommendation is to create a new file at apps/web/.env.production.local and paste the copied variables into it, so that they will override the variables in the other files. Afterwards, copy the result using the "Copy" button again and paste it into your hosting provider's environment variables.
Contextual Validation
Thanks to contextual validation, we can validate environment variables based on the value of other environment variables. For example, if you have a variable NEXT_PUBLIC_BILLING_PROVIDER with the value stripe, we can validate that all the variables required for Stripe are set.
Using the Dev Tool to Debug Environment Variables
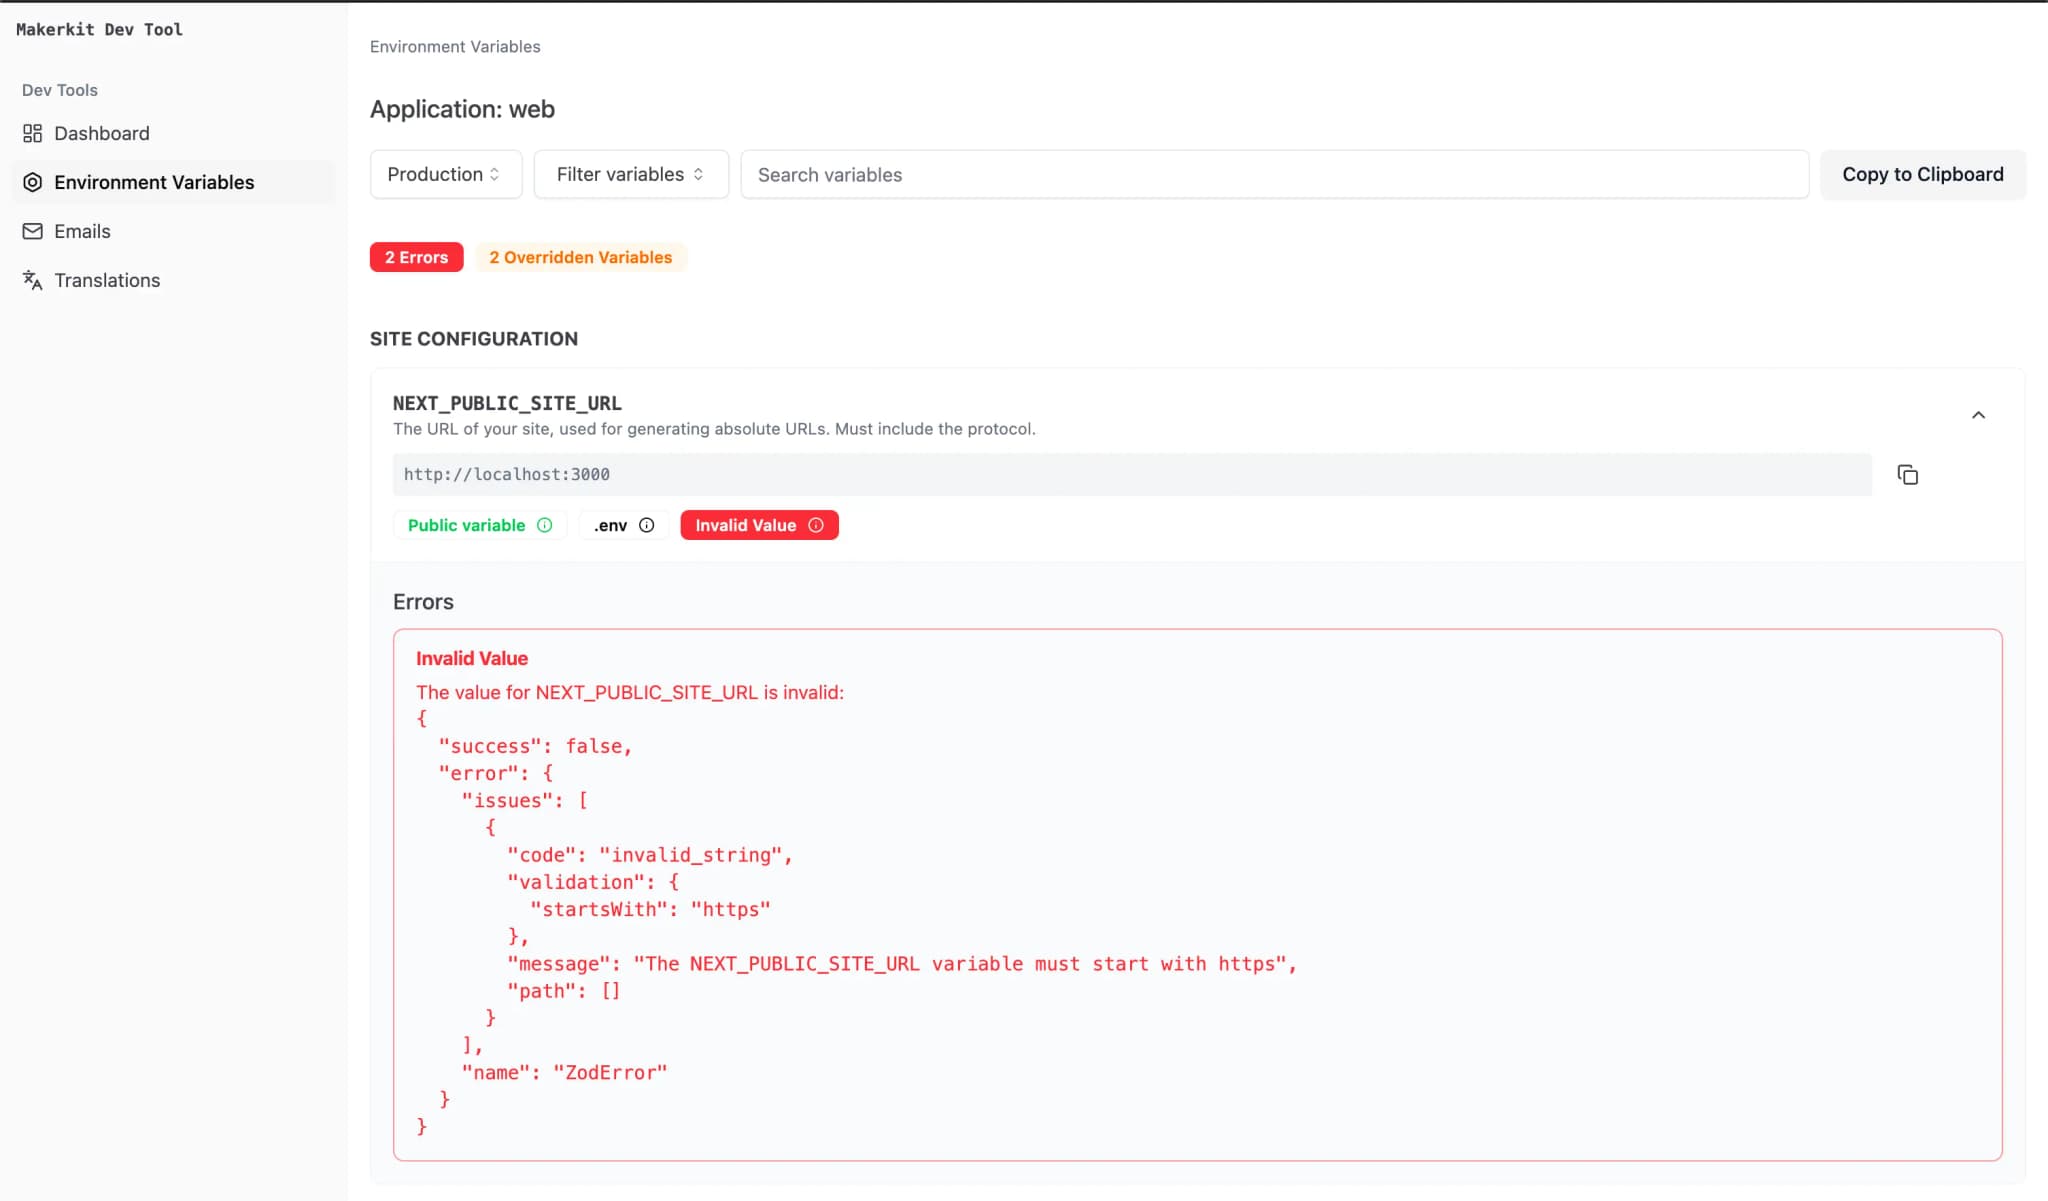
The Dev tool shows at a glance the current state of your environment variables. It also shows you the errors that might occur when using the environment variables.
- Valid: This shows you the valid values for the environment variable. Bear in mind, the fact a value is valid does not mean it is correct. It only means that the data-type is correct for the variable.
- Invalid: This shows you the errors that might occur when using the environment variable. For example, if you try to use an invalid data-type, the Dev Tool will show you an error message. It will also warn when a variable is required but not set.
- Overridden: This shows you if the environment variable is overridden. If the variable is overridden, the Dev Tool will show you the value that is being used.
Use the filters to narrow down the variables you want to debug.
Debugging Production Environment Variables
Of course, most of your production environment variables will be set in your hosting provider for security reasons. To temporarily debug your production environment variables, you can use the following steps:
- Copy the variables from your hosting provider
- Create a file at
apps/web/.env.production.local. This file will be ignored by Git. - Paste the copied variables into the
apps/web/.env.production.localfile. - Use
Productionas the mode in the Dev Tool. - Analyze the data in the Dev Tool.
Important: Delete the apps/web/.env.production.local file when you're done or store it securely.
Adding your own Environment Variables
During your development workflow, you may need to add new environment variables. So that you can debug your application, you can add your own environment variables to the Dev Tool.
Let's assume you want to add the following environment variables:
NEXT_PUBLIC_ANALYTICS_ENABLED=trueNEXT_PUBLIC_ANALYTICS_API_KEY=valueTo add these variables, you need to create a new file in the apps/dev-tool/app/variables/lib/env-variables-model.ts file.
The file should look like this:
apps/dev-tool/app/variables/lib/env-variables-model.ts
[ { name: 'NEXT_PUBLIC_ANALYTICS_ENABLED', description: 'Enables analytics', category: 'Analytics', validate: ({ value }) => { return z .coerce .boolean() .optional() .safeParse(value); }, }, { name: 'NEXT_PUBLIC_ANALYTICS_API_KEY', description: 'API Key for the analytics service', category: 'Analytics', contextualValidation: { dependencies: [{ variable: 'NEXT_PUBLIC_ANALYTICS_ENABLED', condition: (value) => { return value === 'true'; }, message: 'NEXT_PUBLIC_ANALYTICS_API_KEY is required when NEXT_PUBLIC_ANALYTICS_ENABLED is set to "true"', }], validate: ({ value }) => { return z .string() .min(1, 'An API key is required when analytics is enabled') .safeParse(value); } }}]In the above, we added two new environment variables: NEXT_PUBLIC_ANALYTICS_ENABLED and NEXT_PUBLIC_ANALYTICS_API_KEY.
We also added a validation function for the NEXT_PUBLIC_ANALYTICS_API_KEY variable. This function checks if the NEXT_PUBLIC_ANALYTICS_ENABLED variable is set to true. If it is, the NEXT_PUBLIC_ANALYTICS_API_KEY variable becomes required. If it is not, the NEXT_PUBLIC_ANALYTICS_API_KEY variable is optional.
In this way, you can make sure that your environment variables are valid and meet the requirements of your application.