Checklist to ship a MakerKit application to Production
Before going to production, it's essential to follow certain precautions to avoid failures.
1) Environment Variables
First, we must safely inject the correct environment variables into their relative environment. MakerKit has predefined templates that allow you to understand where each variable should be added.
Before publishing your SaaS, or if you are making a production release after a change and this included an environment variable; ensure your CI provider is up to date with the correct variable in the right environments.
Since the .env file will not be committed to your repository, you will need to add the environment variables beforehand.
Check out our Environment Variables documentation for more information.
2) Supabase Postgres Row Level Security (RLS) Policies
If you are using Supabase, you will need to ensure that your RLS policies are set up correctly, and that the changes are propagated to the production database.
3) Sync your database schema with your remote Supabase database
If you are using Supabase, you will need to ensure that your database schema is in sync with your remote Supabase database.
You can do this using the Supabase CLI: for more information, please refer to the Supabase CLI documentation.
More specifically, you need to run the following command:
supabase db pushYou may need to link your Supabase project to your local Supabase CLI instance first.
After running this command, navigate to your Supabase project and check that the database schema is in sync with your local database schema.
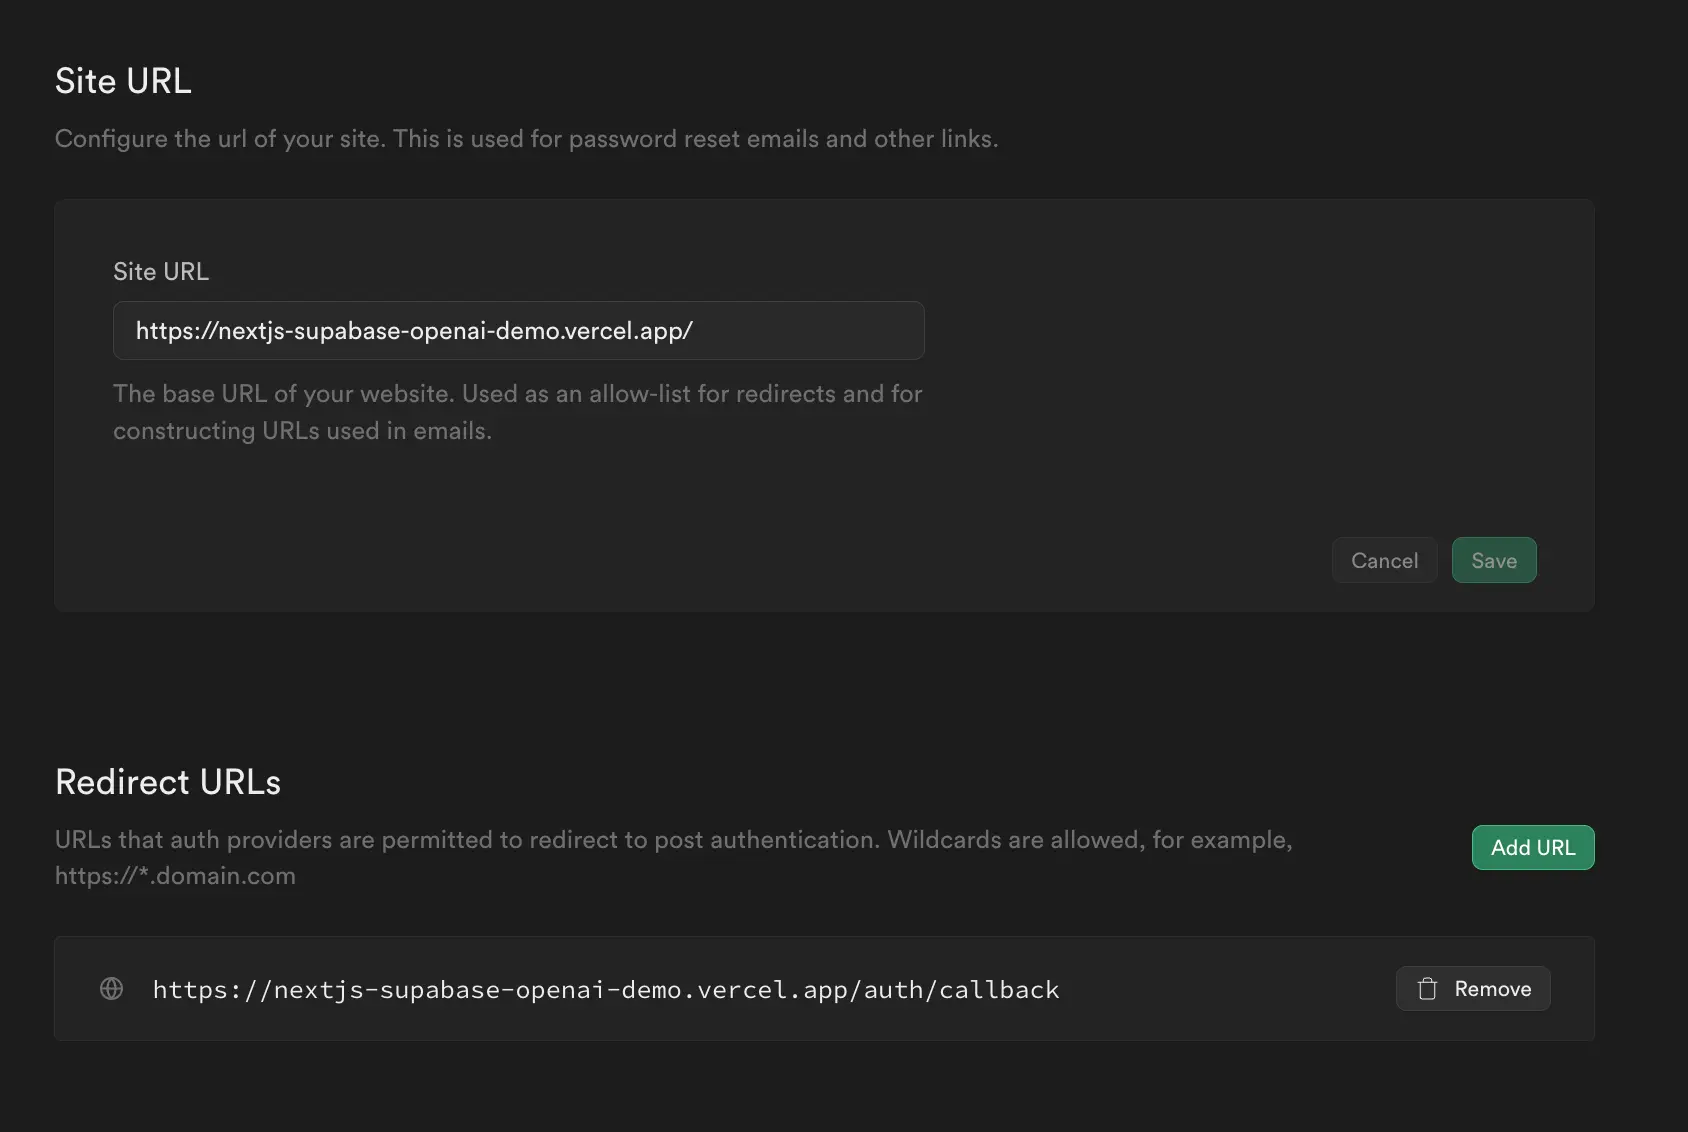
4) Configuring Authentication URLs in Supabase
We need to add the app's URL to the Supabase Auth settings. To do this, navigate to the "Auth" tab in your project's dashboard and then navigate to the "URL Configuration" tab.
From here:
- Site URL: set up the "Site URL" field using your Vercel URL
- Redirect URLs: set the "Redirect URLs" field using the following URL:
https://<your-vercel-url>/auth/callback
This is fundamental, as it will allow Supabase to redirect users back to our application after they log in.

5) Enable your Stripe account Billing Status
Remember to complete your Stripe account's information and enable billing and to not forget it in Testing Mode.
Additionally, you will need to add your Stripe API keys to the environment variables to process payments. Ensure you have added the correct keys to the correct environment and that have selected all the required events to your webhook.
Please follow the Stripe configuration guide to configure your Stripe account.
If you use Lemon Squeezy - the same applies.
6) Add your SMPT service credentials
You will need to add your SMTP service credentials to the environment variables to send emails. This is required for sending emails to users when they are invited to an organization.
To set the credentials, add them to the environment variables in the correct environment.
Remember to do the same for your emails in Supabase - as the limits are extremely low in the free plan and may not be enough for your application.
Please follow the email configuration guide to learn more about how to configure your SMTP service.
7) Configure the Image Remote Patterns in your Next.js configuration
You will need to configure the image remote patterns in your Next.js configuration to allow the images to be served from the correct domain. This needs to match the domain of your Supabase Storage bucket domain - and other eventual domains you may be using to serve your images.
8) Follow the Supabase guide
Follow the Supabase guide to ensure you have followed all the steps to deploy your application to production.
9) Enable Sentry (Optional)
With 4000 events for free per month, we recommend that you use Sentry.io for ensuring you can catch, analyze and fix any runtime errors in your application that your users will encounter.
10) Set up a Logging Service (Optional, highly recommended)
We recommend that you use a logging service to log any events that occur in your application. This will allow you to debug any issues that may occur in your application.
While this is optional, we highly recommend that you use a logging service. Logging is how you can debug issues in your application, and it is essential to have a logging service in place.
Some logging services that we recommend are:
The above can be installed with a one-click install in the Vercel dashboard (if you are using Vercel).