Setting up a Firebase project for your MakerKit application
Learn how to set up your Firebase project with a MakerKit application
You should be all set if you have already installed NodeJS on your machine. If not, please install NodeJS before continuing.
If any of the following commands do not work, please install the Firebase tools package globally:
npm i firebase-tools -gNow, run this command to set up your Firebase project:
firebase initNow, select all the products you would like to set up. If you're not sure yet, I recommend the following ones:
- Emulators
- Cloud Firestore
- Cloud Storage
- Remote Config
You do not need any changes to start developing your application
You do not need any changes to start developing your application. Feel free to complete the configuration once you want to deploy the app for the first time.
By default, Makerkit starts the application with a demo project demo-makerkit.
You can rename the demo name however you want, as long as you keep the prefix "demo", which tells Firebase not to use any production service and not to require additional configuration for developing the application. In fact, you do not need to create a Firebase project to get started!
Additionally, remember to change the project in the environment variables.
If you also want to create a real Firebase project, please read on.
Create or select a Project
If you have already created a project using the Firebase Console, continue by using "Use an existing project"; otherwise, you can create one right away by selecting "Create a new project".
If you're more comfortable creating a new project using the Firebase Console, create a new project from here.
Emulators
The CLI should prompt you to choose the emulators to download and the ports for each. Next, select the emulators you need based on the products selected during the first step.
Otherwise, you don't need to make any changes because this starter already uses the Firebase default ports.
Once completed, you should have the following new files in your project:
.firebasercfirebase.jsonfirestore.rulesfirestore.indexes.json
Firebase Project Set-up
If you have created a Firebase project, you should be able to access this project using the Firebase Console.
We assume you're building a web app: let's create a new web project.
Loading video...
Copying the Firebase configuration in the environment file
After the previous step, you should be seeing the Firebase configuration object.
We need to add this to your .env.production file, which will automatically populate the project configuration file ~/.configuration.
NEXT_PUBLIC_FIREBASE_API_KEY=NEXT_PUBLIC_FIREBASE_AUTH_DOMAIN=NEXT_PUBLIC_FIREBASE_PROJECT_ID=NEXT_PUBLIC_FIREBASE_STORAGE_BUCKET=NEXT_PUBLIC_FIREBASE_MESSAGING_SENDER_ID=NEXT_PUBLIC_FIREBASE_APP_ID=NEXT_PUBLIC_FIREBASE_MEASUREMENT_ID=Next.js bundles the environment variables prefixed with "NEXT_PUBLIC" with your client-side code. It means that you should use these for non-secret values that need to be exposed.
Auth Domain
To make sure that the authentication works correctly across the majority of browsers, please make sure the NEXT_PUBLIC_FIREBASE_AUTH_DOMAIN is set to your custom domain.
For example, if your app is hosted at https://app.makerkit.dev, the NEXT_PUBLIC_FIREBASE_AUTH_DOMAIN should be set to app.makerkit.dev.
This is extremely important for the authentication to work correctly.
Getting the service account
You can find the service account by clicking on Settings->Service Accounts. You should copy the text highlighted in the video below:
Loading video...
Afterward, you need to populate the relative environment variable:
SERVICE_ACCOUNT_CLIENT_EMAIL=You could safely add it using the file of your staging account. If it's your production environment, please add it using the Vercel console instead (or any other service you use to deploy the project).
Generating the Private Key
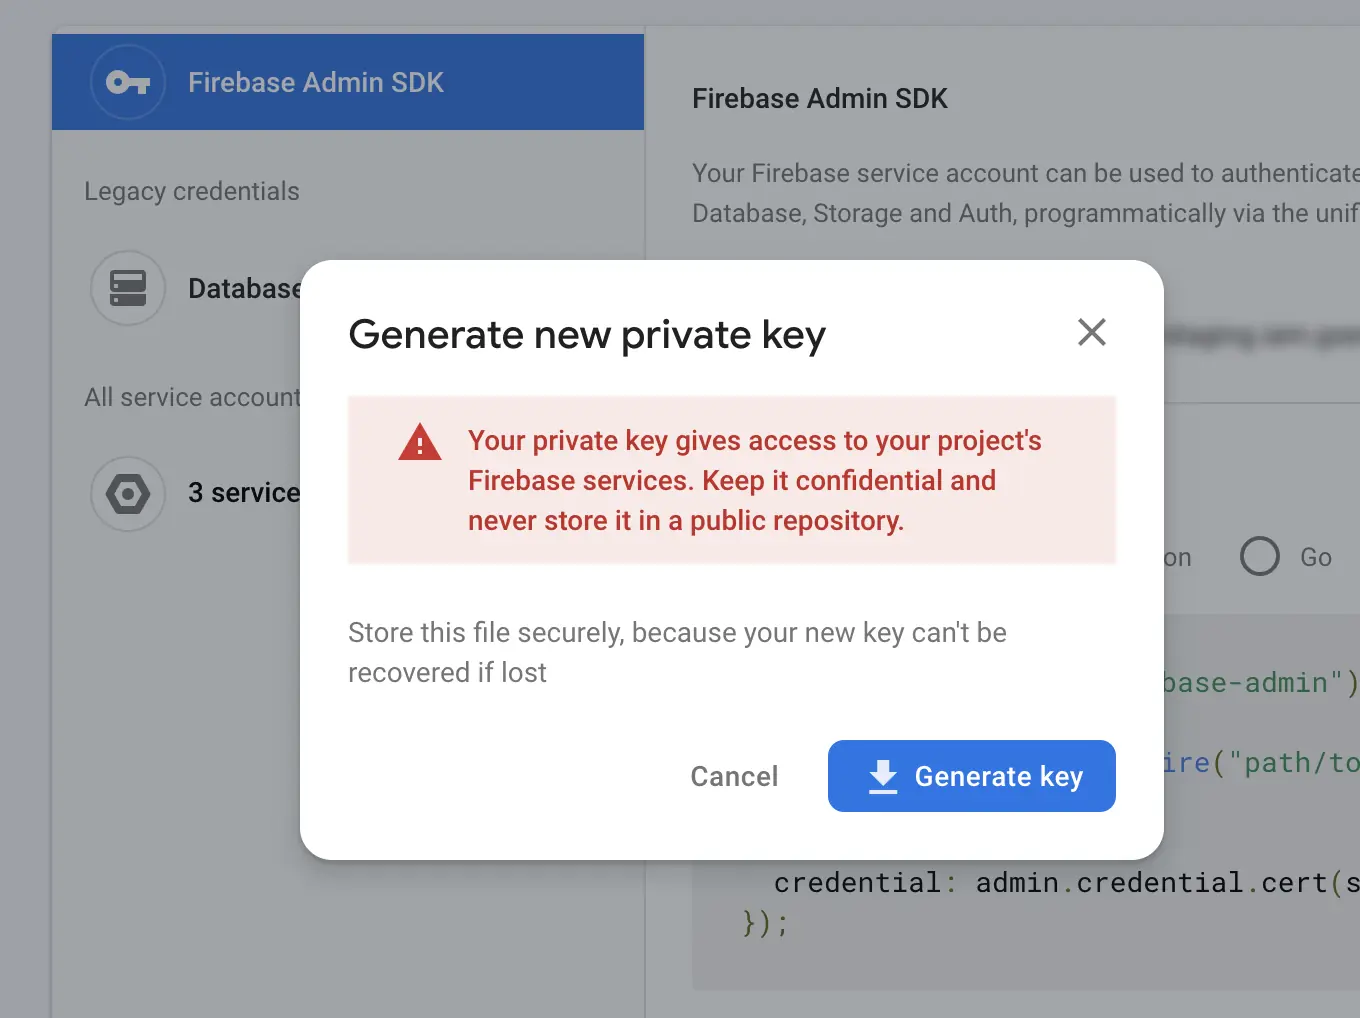
The private key is fundamental to running your app with Admin permissions on the server side. From the same page, click on "Generate Private key".
You should see the modal below:

Once you open the generated JSON file, copy the private_key property and place it in your CI or your environment file as long as you do not commit the environment file.
The environment variable to populate is SERVICE_ACCOUNT_PRIVATE_KEY:
SERVICE_ACCOUNT_PRIVATE_KEY=The key looks like this:
-----BEGIN PRIVATE KEY-----***************************-----END PRIVATE KEY-------If you enter the wrong key, you will not be able to sign in server-side. In short, it won't work.
Do not commit the file if you add the private key to your local environment file
Firestore
Now it's time to set up Firestore DB. From the main panel on the left-hand side of the Firebase Console, click on Firestore Database.
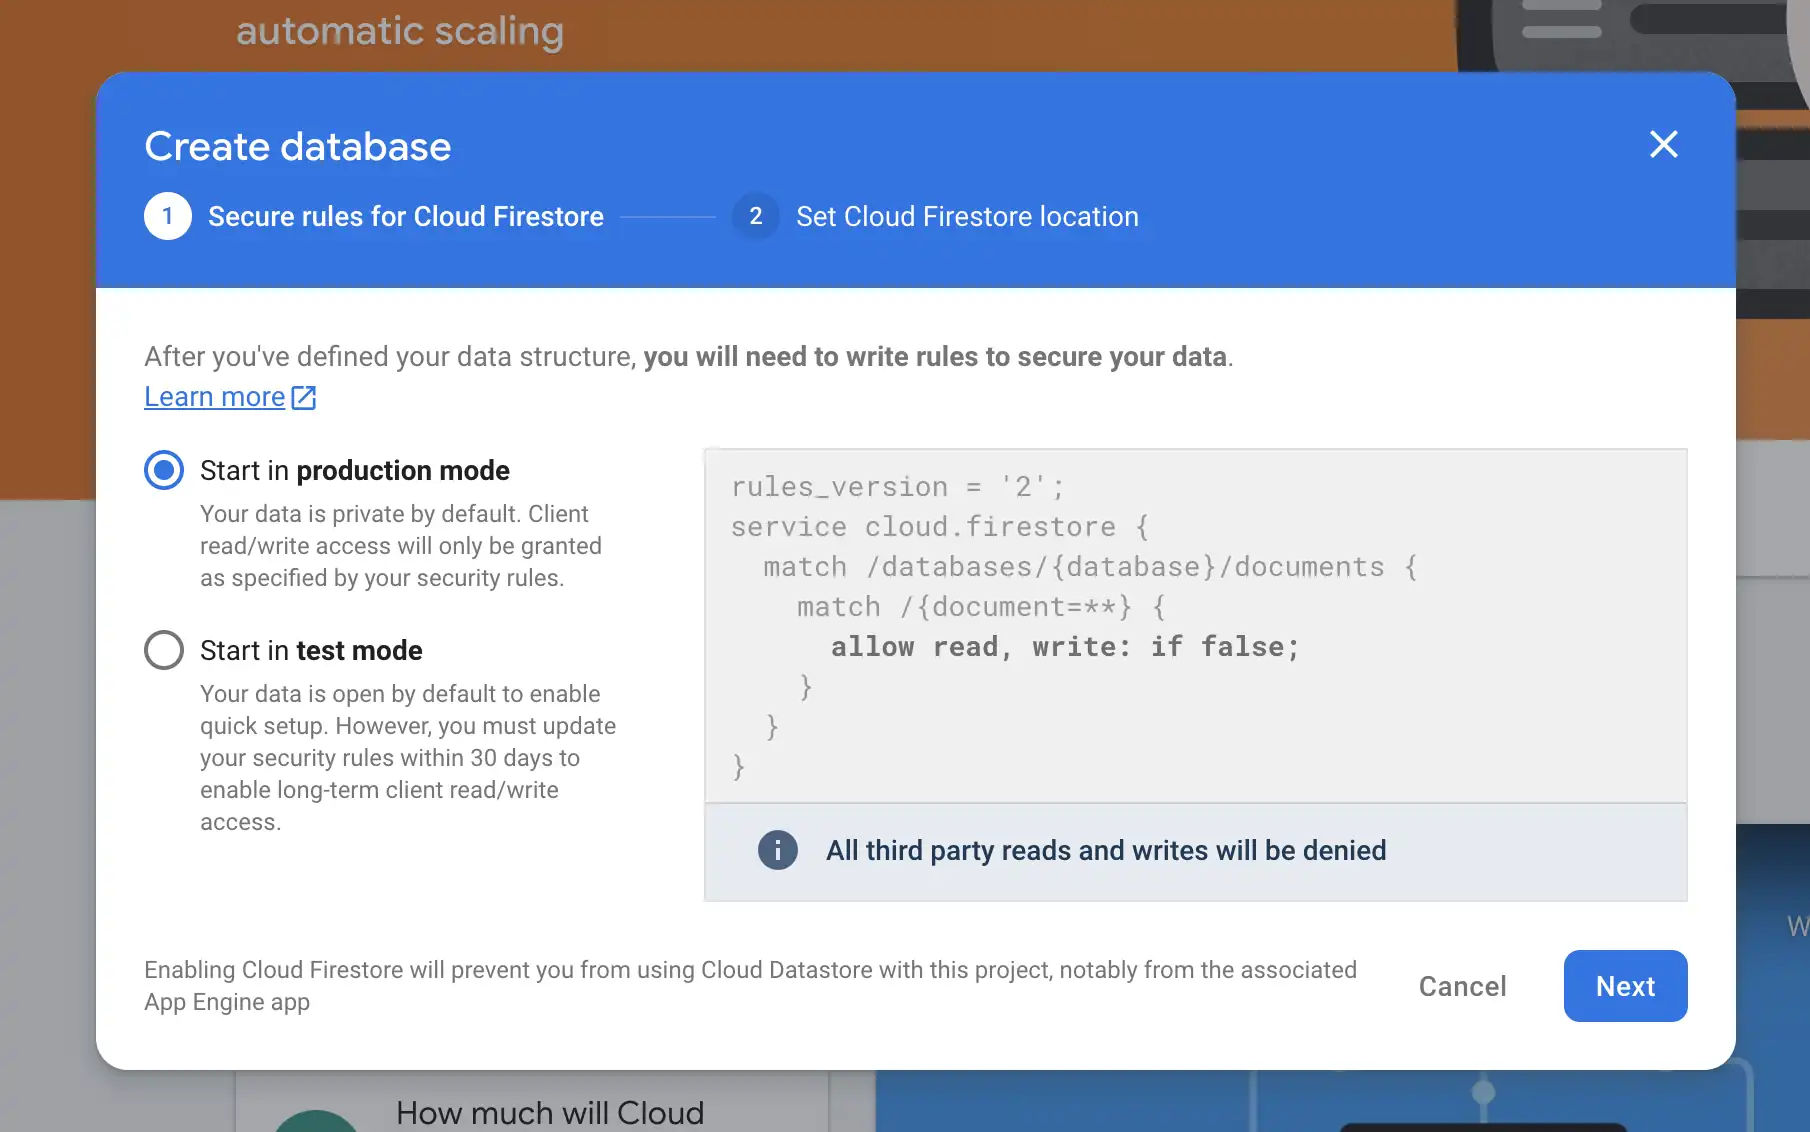
Once you click on the Create Database CTA, you will se a modal like in the image below:

Don't overthink what to choose: we use the default MakerKit Firestore rules which use the production configuration by default.
Location
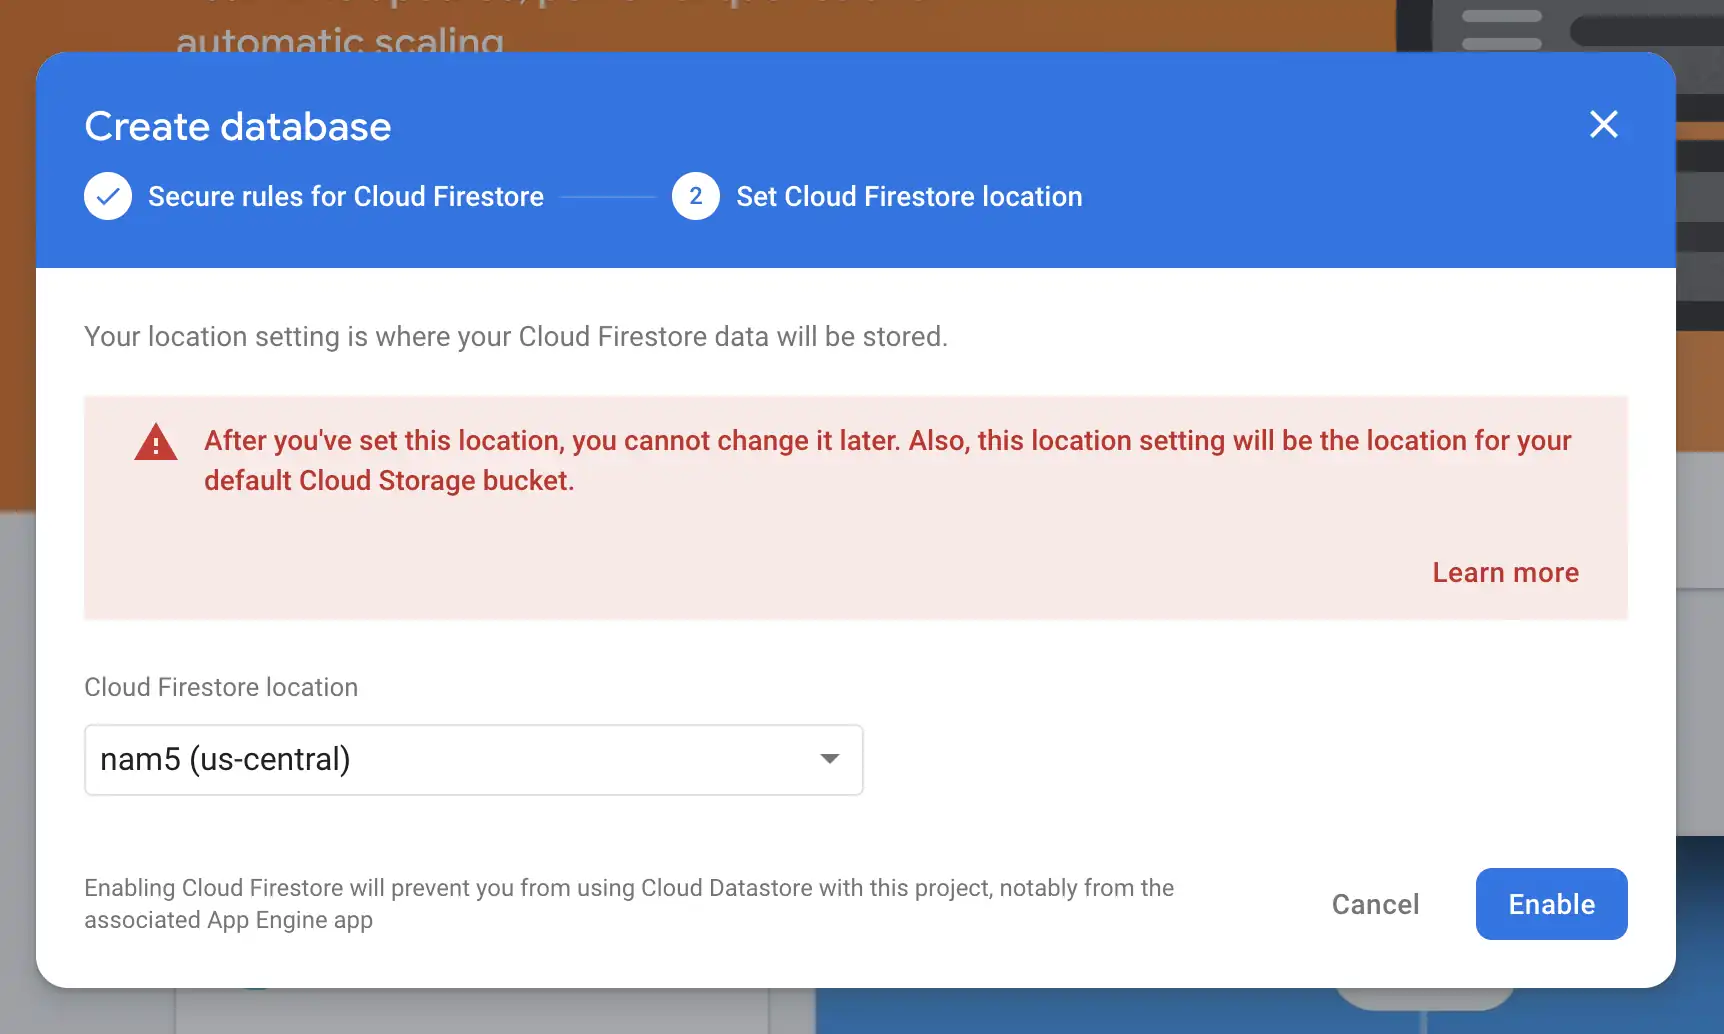
The next step is to choose the Firestore Database's location.
Which option to choose here depends entirely on where you think most of your users come from.

Be careful to the Firebase notice:
After you've set this location, you cannot change it later. Also, this location setting will be the location for your default Cloud Storage bucket.
If you're not sure, think it through. You do not need this step to start working on your app with the Emulators, so feel free to come back to this later when you have made a decision.
Firestore Indexes
If you are setting up Makerkit for the first time, remember to set up an index for querying an invitation without knowing its organization.
You can do so using the following link (replace "[[YOUR_PROJECT_ID]]" with your real project ID):
https://console.firebase.google.com/u/0/project/[[YOUR_PROJECT_ID]]/firestore/indexes/single-field?create_exemption=ClBwcm9qZWN0cy9zdG9yeWpveS00NmVlMy9kYXRhYmFzZXMvKGRlZ mF1bHQpL2NvbGxlY3Rpb25Hcm91cHMvaW52aXRlcy9maWVsZHMvY29kZRACGggKBGNvZGUQAQ
Firestore and Storage Security Rules
Finally, you are required to publish the security rules to the production project.
You can do so by logging in to the Firebase Console and pasting the rules from the firestore.rules and storage.rules files in their respective sections.
You don't need to do this right away, but you will need to do it before you deploy your application to production.